 |
||||||||||||||||||||||||||||||||||||||||||||||||
|
Cloth - Introduction and Leather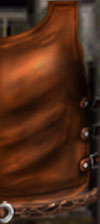 There are a lot of types of cloth that exist in the world. Any kind of clothing that you would be able to find on a person can be classed in two ways. Firstly, by its material. This includes canvas, burlap, satin, silk, leather, etc. There are many possibilities. The second is stitching. For complex and elaborate fabrics, designs are stitched on in a certain fashion. Some clothes are also stitched together in various ways - take Gimli's vest as an example. It has a very distinct stitching pattern that requires a bit of thought to duplicate on a texture. So, anyways, the point of the tutorial is to illustrate a few ways of creating and defining cloth on a texture. There are a lot of different clothing types though, so I can't cover everything in great detail. Instead, I will focus on a few examples that should be useful for BFME applications - a heavy leather, a 'common' fabric, a fine grained, flowing weave, and of course, something rough and distinctly... orcish. Leather as a material is quite common in LOTR. It is strong, can be rigid or soft, and is relatively easy to make. Due to it's properties, it makes decent, flexible armour for either fast skirmish troops (Rangers of Gondor) or cheap, common armour for muster troops such as the peasants of Rohan. Sooo.. you may be making a lot of it. It's differnt method of highlighting makes it unique, it has an almost plastic sheen to it and does not have any stitching. I'll walk through the steps of making a leather chestplate and skirt for a Rohan Peasant. As such, it will be based off the Peasant skin., but pay no attention to it, we'll just be focusing on the leather area. As such, the texture layout is aalready done and there is no need to meticulously make sure everything is in the right place. It also means that we are only drawing half of the chestplate. so keep that in mind. Open up rupeasant01.dds in Photoshop. Now, save as a .psd file in the directory of your choice. Make sure you are indeed operating on the psd file, and we can commence. You'll probably want to resize the file to 256x256 pixels first. Then, create a new layer, name it "shirt". On this layer, use the paintbrush with hardness 100% and a variety of sizes to draw over the topof the peasant's body. You'll want to use a medium brown for this, with perhaps a tint of red. The colour is dependant of course on the origin of the leather, and is variable.  The leather here is not too complex, there are no layers or large overlapping straps. first, however, the edges need to be defined. Do this by using the burn tool to etch a line long the edge of the armour. Midtones, a brush of size 1, and expose 45 are a good place to start. This is the stitching line. Further define it using a dodge brush on highlights, going along the edges of the dark area you just burned.  Next, we draw in the highlights. These are done mostly by feel, because I'm doing this without references. Greek armour was made of hardened leather, so you could try a similar style. I will simply give an overview of the methods. First, a medium dodge brush with no hardness and a low exposure can be used to highlight areas that would... be highlighted. For example, the upper chest, and the lower chest to a lesser extent. The centre of the chest will also have a more concentrated highlight than the edges which would be recessed into the armpit areas. My design will be a bit ribbed, like the Spartan design, so it will have a corresponding ribbed highlight pattern.  Highlights must always be mirrored with shadows. To do this, use burn with an exposure of around 20%, set on highlights, to shade dark areas. This includes complementing highlighted areas, shadowing under the armpits, and creating the illusion of depth along the border of the chestplate. This is all done with low hardness brushes with sizes varying between 3 and 21  Although the chestplate now looks decent, it still lacks a couple of elements that will make it stand out. Leather such as this is highly creased when bent, so using burn and dodge we can create dents and folds. Hard, small (1-3) brushes are useful here. I suggest relatively low exposure levels, so that you can layer the burning/dodging.  Now, the saturation has been amplified by the dodge. Dodging in Hilghlight mode tends to do that. So, grab the Sponge brush, set it to desaturate at 10% and dab away a bit of the excess colour. Once done, go to the Hue/Saturation panel (Ctrl+U). Change the Hue by +2, the saturation by -15, and the lightness by -35. The armour may need to be re-dodged a tiny bit.  That concludes the leather chestplate. Of course, for realism, you need to add straps to the sides... since they are leather straps, I'll quickly outline the procedure. Straps Create a new layer, name it "strap". Draw a small box using a size 2 painbrush where you wish one of the straps to be.  Use a tiny dodge brush to highlight the edges of this piece of leather. That's pretty much it for this bit. Create another layer, labelled "strap metal". Take a very low saturation light brown and draw halfa tiny, simple buckle where the strap ends. We draw half since it on this skin it will be mirrored, so we only need half at this point. If the skin cofiguration was different, the whole buckle might need to be drawn. You'll also want to put a tiny stud to anchor the strap to the chestplate. Allpy a few highlights with a strong dodge brush.  You'll next need to shade the "strap" layer. Using a size 2 Burn brush on Highlights, exposure 30%, darken the area around the stud and the buckle so that the illusion of depth is given. Then, select the "shirt" layer and, using the same burn brush shade around the strap.  You might want to edit the strap a bit. Do so now, then copy it three times as shown. You can now merge all the strap metal and strap layers together, and use a large burn brush on highlights to shade them in a way that matches the rest of the armour.  The straps are now complete. There is only one more bit of leatherwork that will be espescially useful, and that is the belt. We will now be constructing an ornamental belt for this warrior. To make the belt, first create a new layer, name it "belt" (big surprise). Using a size 5 brush, draw in a rough belt with hard edges. Use a dark brown colour.  You'll then want to create a new layer - "belt engravings". Take a lighter version of the colour you used for the belt, and a size 1 brush. Carefully draw a pattern of inscriptions on it. I used this for reference. 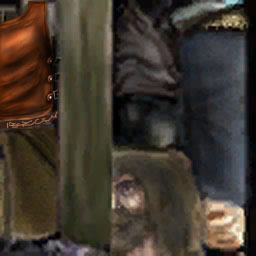 Looks quite terrible. So, begin with the lighting effects! You will want to apply a dodge of exposure 25% on highlights to both the belt and belt engravings layer. The highlight should of course be stronger on the top, but don't let that stop you from highligthing the bottom Set the belt engravings layer to opacity 85%, to reduce the contrast. You could also outline the stitching on the top and bottom of the belt, like we did with the chestplate, but at this resolution there are simply too few pixels to do that.  The buckle is the last remaining section to create. As you can see from the reference, it is of the double loop style... we only need to draw one loop because the texture wil be mirrored. Therfore, make a new layer called "buckle". Use a medium grey with a small brush to create it, then highlight with dodge along the outer edges. Use Burn, set on highlights, to darken the inner edges. This will give the buckle the illsion of being slanted. Finally, switch back to the belt layer and use a hard burn brush to create the shadow the buckle casts. 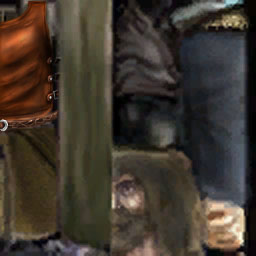 This concludes the leather portion of the tutorial. The next segment will be forthcoming soon. |
|||||||||||||||||||||||||||||||||||||||||||||||