 |
||||||||||||||||||||||||||||||||||||||||||||||||
|
Third Age Gondorian Shield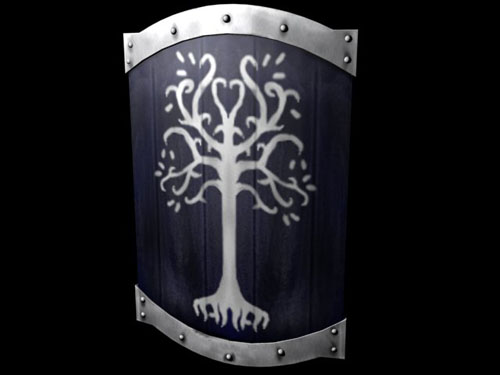 This tutorial will explain the basic process I use to create an object composed of sheet metal. The following covers the creation of a shield, but the techniques can be applied to nearly any type of sheet metal. I assume you know the basics of Photoshop - the tutorial is written for CS1, but applies in many of the previous (and later, I believe) versions. First, you should probably have decided on the type of shield, and your design. It is important to think about it because you can then examine what symmetry the shield has. You will only need to draw half of a Gondorian shield, for example, and perhaps only a quarter of a Rohirrim shield. Overall, this increases the amount of detail you can put into a shield (larger texture area for a smaller object). Even more important if you are using up valuable space on the model's actual texture with the shield. As you can see, we're going to be working on a Third Age Gondorian shield. I'm not concerned about accuracy here, so bear with me if the shield is a bit different than the movie version. It is composed of (at least in my view), a panelled wood surface with the White Tree painted on it. This is enclosed by a pair of metal braces. To begin, create a new document in Photoshop (herin referred to as PS), of size 256x256 pixels. This is a bit large for a shield, but still useable. Fill the background with black. It is important to lay out the texture in an efficient fashion. I am going to illustrate the creation of a back, edge, top and front side, so we need to distribute these areas accordingly. Create a new layer, name it "shield front". It may be useful to enable the ruler (view -> rulers) and set its measurements to pixels (edit -> preferences -> rulers). To the left of the image, select an area around 85 pixels wide and fill it with a deep navy blue. Duplicate this layer and move it to the right of the image. Name it "shield back" Create a new layer again, name this one "shield side". Fill half of the remaining area in the middle area of the shield with the same blue.  Next we create the basis for the metal. So, use a medium grey brush with hard edges, around size 13 or so, and carefully draw in the metal area at the top of the shield. THIS MAY TAKE SEVERAL TRIES. The undo button is your best friend. I know mine isn't perfect. You'll then want to duplicate the layer, then (edit-> transform) frip the clone vertically so that you don't have to draw it again. Then, duplicate again and move it over to the right side of the texture (shield back). Flip this horizontally so that it lines up. Then, again, carefully, take the eraser and shave off a few pixels so that the metal on the back is only a few pixels thick. Merge this and the other metal layer back into to the shield metal layer.  Next, draw in the metal that covers the edge piece as is shown in the following picture. Also, select a portion of the remaining black area and fill it with grey to create the top of the shield. 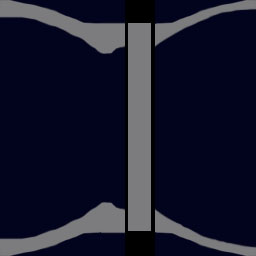 The most important thing that is key to making metal look right is lighting. I can plop a grey mass down and call it metal, but real metal reflects light in a ceratin way. So therfore, we must work on hilighting the metal that is present on the shield. First thing to do is decide on the direction of the light. Here, the majority of the time, light will be coming at a downward angle from above. Soooo... that is where we'll put the highlights and corresponding shadows!. Make sure the "shield metal" layer is selected and grab a Dodge brush, set on Highlight mode, of around size 13, exposuse 25%, with a hardness of 0%. The shield is rounded, so we want to emphasize that by highlighting the centre of the front metal bands significantly. Correspondingly, highlight the edge of the back metal bands. The centre top piece should be highlighted all round lightly, but concentrated in the middle. All highlighting is subjective, you choose what looks right. I'm just going to tell you how. Use quick bruh strokes instead of long ones so that you can easily undo, do not over-highlight large areas like these. If it ever turns pure white, you've highlighted too much. 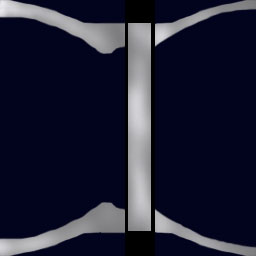 Now we move on to the edge highlights. Light shines off edges a lot, and looks cool doing it. So take a dodge bursh of size 3, with hardness 100% on highlights, and start to go along the edges that will be highlighted. Some things to keep in mind: -Where is the light coming from? This affects where the highlight will show up - you will not see a strong highlight on an edge that is facing away from the light -Highlight ALL edges a tiny bit, to give them a bit of an edge -Again, do not over-highlight. White at this stage is fine though, as long as you keep it very fine 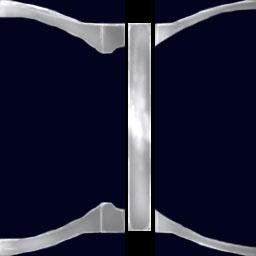 Now, the edges are done.. but it looks a bit strange, with just the edges highlighted. So, take a brush with less hardness and spread the higlights out. Again, this is an intuitive process... it takes a good eye and practice. I use a 0% hardness 5-9 pixel brush to simply "round off" some of my highlights, and emphasize others. At this stage, you can experiment with the exposure value. Metal is never perfectly uniform in reflectivity, so a bit of variation is welcome. 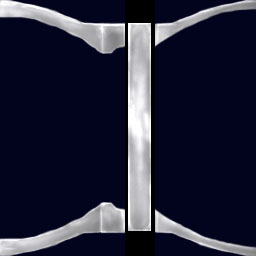 Once you are satisfied with your highlight job (don't worry though, you can always come back to it), go to Filter-> Noise -> Add noise. This de-uniformizes the metal a bit. Set it to Gaussian, and Monochromatic. Mess around with the Amount a bit, I recommend between 1 and 1.5% for this particular texture. Then, notice that the original shield has a few metal rivets. We'll create those next. Create a new layer, name it "rivets". Using a 100% Hardness 5 pixel paintbrush, create a single medium grey dot somewhere on the layer. We need to highlight this. Use a high exposure dodge brush to highlight the centre to round it, the use a low exposure brush for highlights around the top. You can even use a Burn brush set on midtones or highlights to darken the bottom of the new rivet if you like. Then, once you're satisfied, duplicate the rivet and move it to the right locations as shown by references. Merge them all into one layer and modify the layer opacity until it "looks right". 85% is around right in this case. The next step is a little touchy. You want it to look like the rivets are casting a tiny shadow.... so go back to the metal layer and select the Burn tool, on Highlights mode, with armound 25% exposure. Carefully burn a tiny shadow around each rivet. If pulled off correctly, it adds to the realism and visibility in-game. I'll take this moment to say something. Shadows and highlights should be exaggerated. Otherwise, the game's LOD will blur the details and they will become invisible. So don't worry if things jump out of the texture. 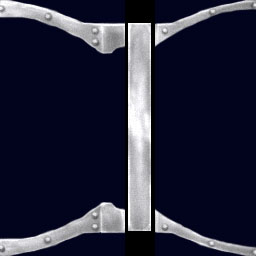 The metal should be approximately done now. The shield is made of wood, which is painted a dark navy blue, almost black. We need to develop a shading method that will illustrate this. SO, go to the "shield front" layer. Select Burn, and use a midtones brush to slightly shade the areas around the metal - where the metal would cast a tiny shadow. Then, switch your bush to size 3, still on midtones and lightly create lines down the front of the shield. They willl form the shading for the individual wood boards. These can be made more easily by holding Shift (constrains to horizontal/vertical). Repeat both of the above steps for the back of the shield. Then, switch to Dodge, using the highlights mode, with a size 3 brush. Lightly highlight on both sides of the panel lines - again, this gives more definition to the lighting... but you don't want too much, as these are barely visible on the shield prop. 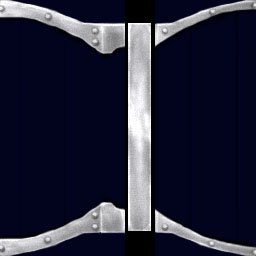 Next, we need to paint in the shield highlights, just like the metal highlights. Wood doesn't reflect as much as metal, so these will be less intense. Take a large dodge brush on highlights to lighten the centre of the front and edges of the back layer. 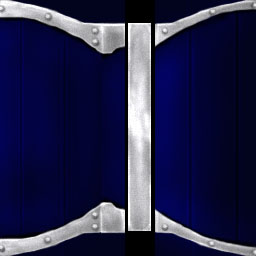 Notice that the metal is now much too blue. The highlights brought out the saturation a bit too much. So, use the desaturate tool to steal away a bit of that colour. Some bits may need to be rehighlighted, so continue at it until you have something you like. This again is very subjective, but try to give a bit of a streaked look - wood is like that. Now, you are going to want to apply edge highlights to the parts of the shield that will be "on edge", so to speak. Use a small (3) dodge brush on highlights, and desaturate as necessary. 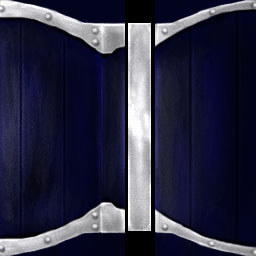 That concludes the wood panels. The one remaining major component of the shield is of course the White Tree of Gondor. Now, at first glance, this is quite difficult to draw accurately. The first glance is correct. First, you'll need to grab a good reference. The best I found (took me all of 30 seconds) is HERE. Create a new layer, names "tree". Use a very light grey brush with 100% hardness for this. Size will vary. Remember, you only need to draw half the tree. I'll provide a few pictures of the stages my tree went through. The undo key is your friend. 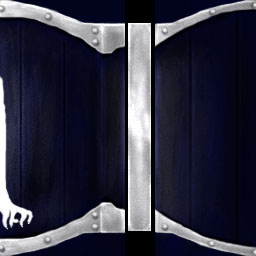 Used a size 9 brush for the trunk, size 3 and 1 brushes for the roots. 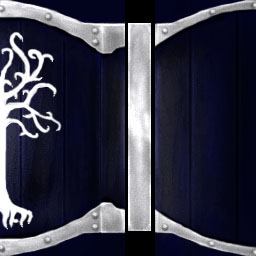 Used sizes 5, 3, and 1 for the branches. 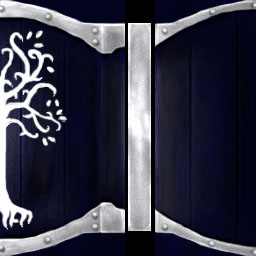 Used sizes 3 and 1 for the leaves. You could also just copy the picture... or trace it... but it's more rewarding to say "Yes, I drew that." to someone who asks. Now, apply a bit of noise to the tree layer. A few highlights will also help the tree blend in. Use a dodge brush to apply the same pattern of higlights as you did to the front of the the shield. You can also use the burn tool set on highlights to darken the tree where it crosses the wood panel lines.  This here is the finished version. I've done a bit of further work, mainly just touching up the highlights with Dodge, Burn and Desaturate. Again, this is subjective. Once you have something that looks right, stop. Now you can UV map it to your shield model and use it. There's even a bit of space left on the texture for straps and buckles, if you're modelling those as well. 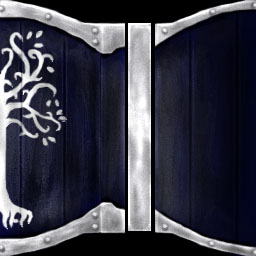 This concludes the tutorial. Thank you for reading. All materials in this tutorial should only be redistributed with his explicit permission. The original shield design is the property of New Line Cinema and should be treated as such. |
|||||||||||||||||||||||||||||||||||||||||||||||


